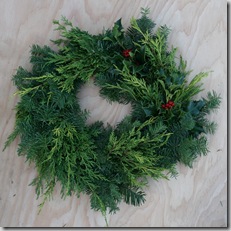
Now that Thanksgiving is properly over, we can start thinking about Christmas without everybody groaning. This is especially good news to me, since I love whistling Christmas carols year-round. Finally! The one month of the year I can whistle my rousing rendition of Jingle Bells without causing raised eyebrows.
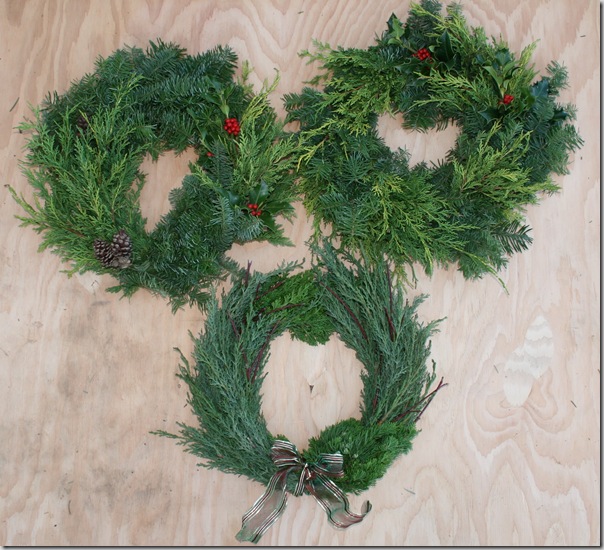
There is so much that I love about this time of year – baking Christmas cookies and doing top-secret present-related things among them. But one of my favorite traditions is making my own Christmas wreath. They’re pretty, they smell fresh, and every time you walk up to the door it gives you a bit of a smile.
I made my first wreath after a particularly long pruning day in which the colored conifer and red-twig dogwood trimmings were so beautiful that I just couldn’t bear to throw them in the compost pile. I thought to myself, if Martha can make her own Christmas wreath, then so can I.
Actually, that might not have been my exact thought, but I figured I could make something cheerful enough that I wouldn’t mind looking at it for a few weeks. It turned out to be so easy and fun, that it became an every-year tradition. There’s something fun and meditative about going out and doing some pruning, then coming home and sorting it all into neat little bundles and then into a wreath.
If you have some beautiful colored conifers, red twig dogwoods, eucalyptus, or even a selection of herbs you can prune, you’re halfway there. All you need now is about three hours and some unfussy space where you can spread out and get clippings all over – like, not on the carpet (I learned this through tough experience – who knew conifers had so much darn sap?). Oh, and you’ll probably want a wreath frame and some wire. Here’s the list.
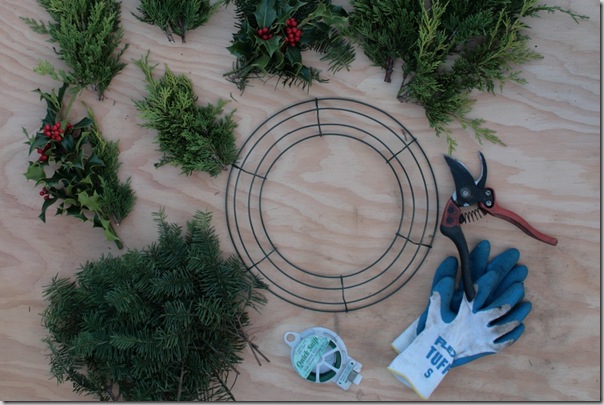
Stuff you’ll need:
- A wreath frame of some kind (mine was about $3 at Michael’s and can be re-used every year)
- Some green, thin wire for tying the foliage onto the frame ($3, lasts for years of wreaths)
- Pruners
- Thin nitrile gloves so you don’t get your hands all sappy
- A bow, if you’re so inclined (I like mine au naturel, but everyone I have given a wreath to has been like, “but where’s the bow? You need to put a bow on there.” Whatevs. I’m a gardener, I like foliage.)
- A shopping bag or two of pretty clippings
And while the type of clippings definitely matters, there’s room here for you to get creative. If you’re going to go offroad and get crazy with it, try to pick things that have waxy leaves and look unlikely to wilt right away, or go for things that look just as good dried as they do fresh, like herbs.
What type of clippings to score:
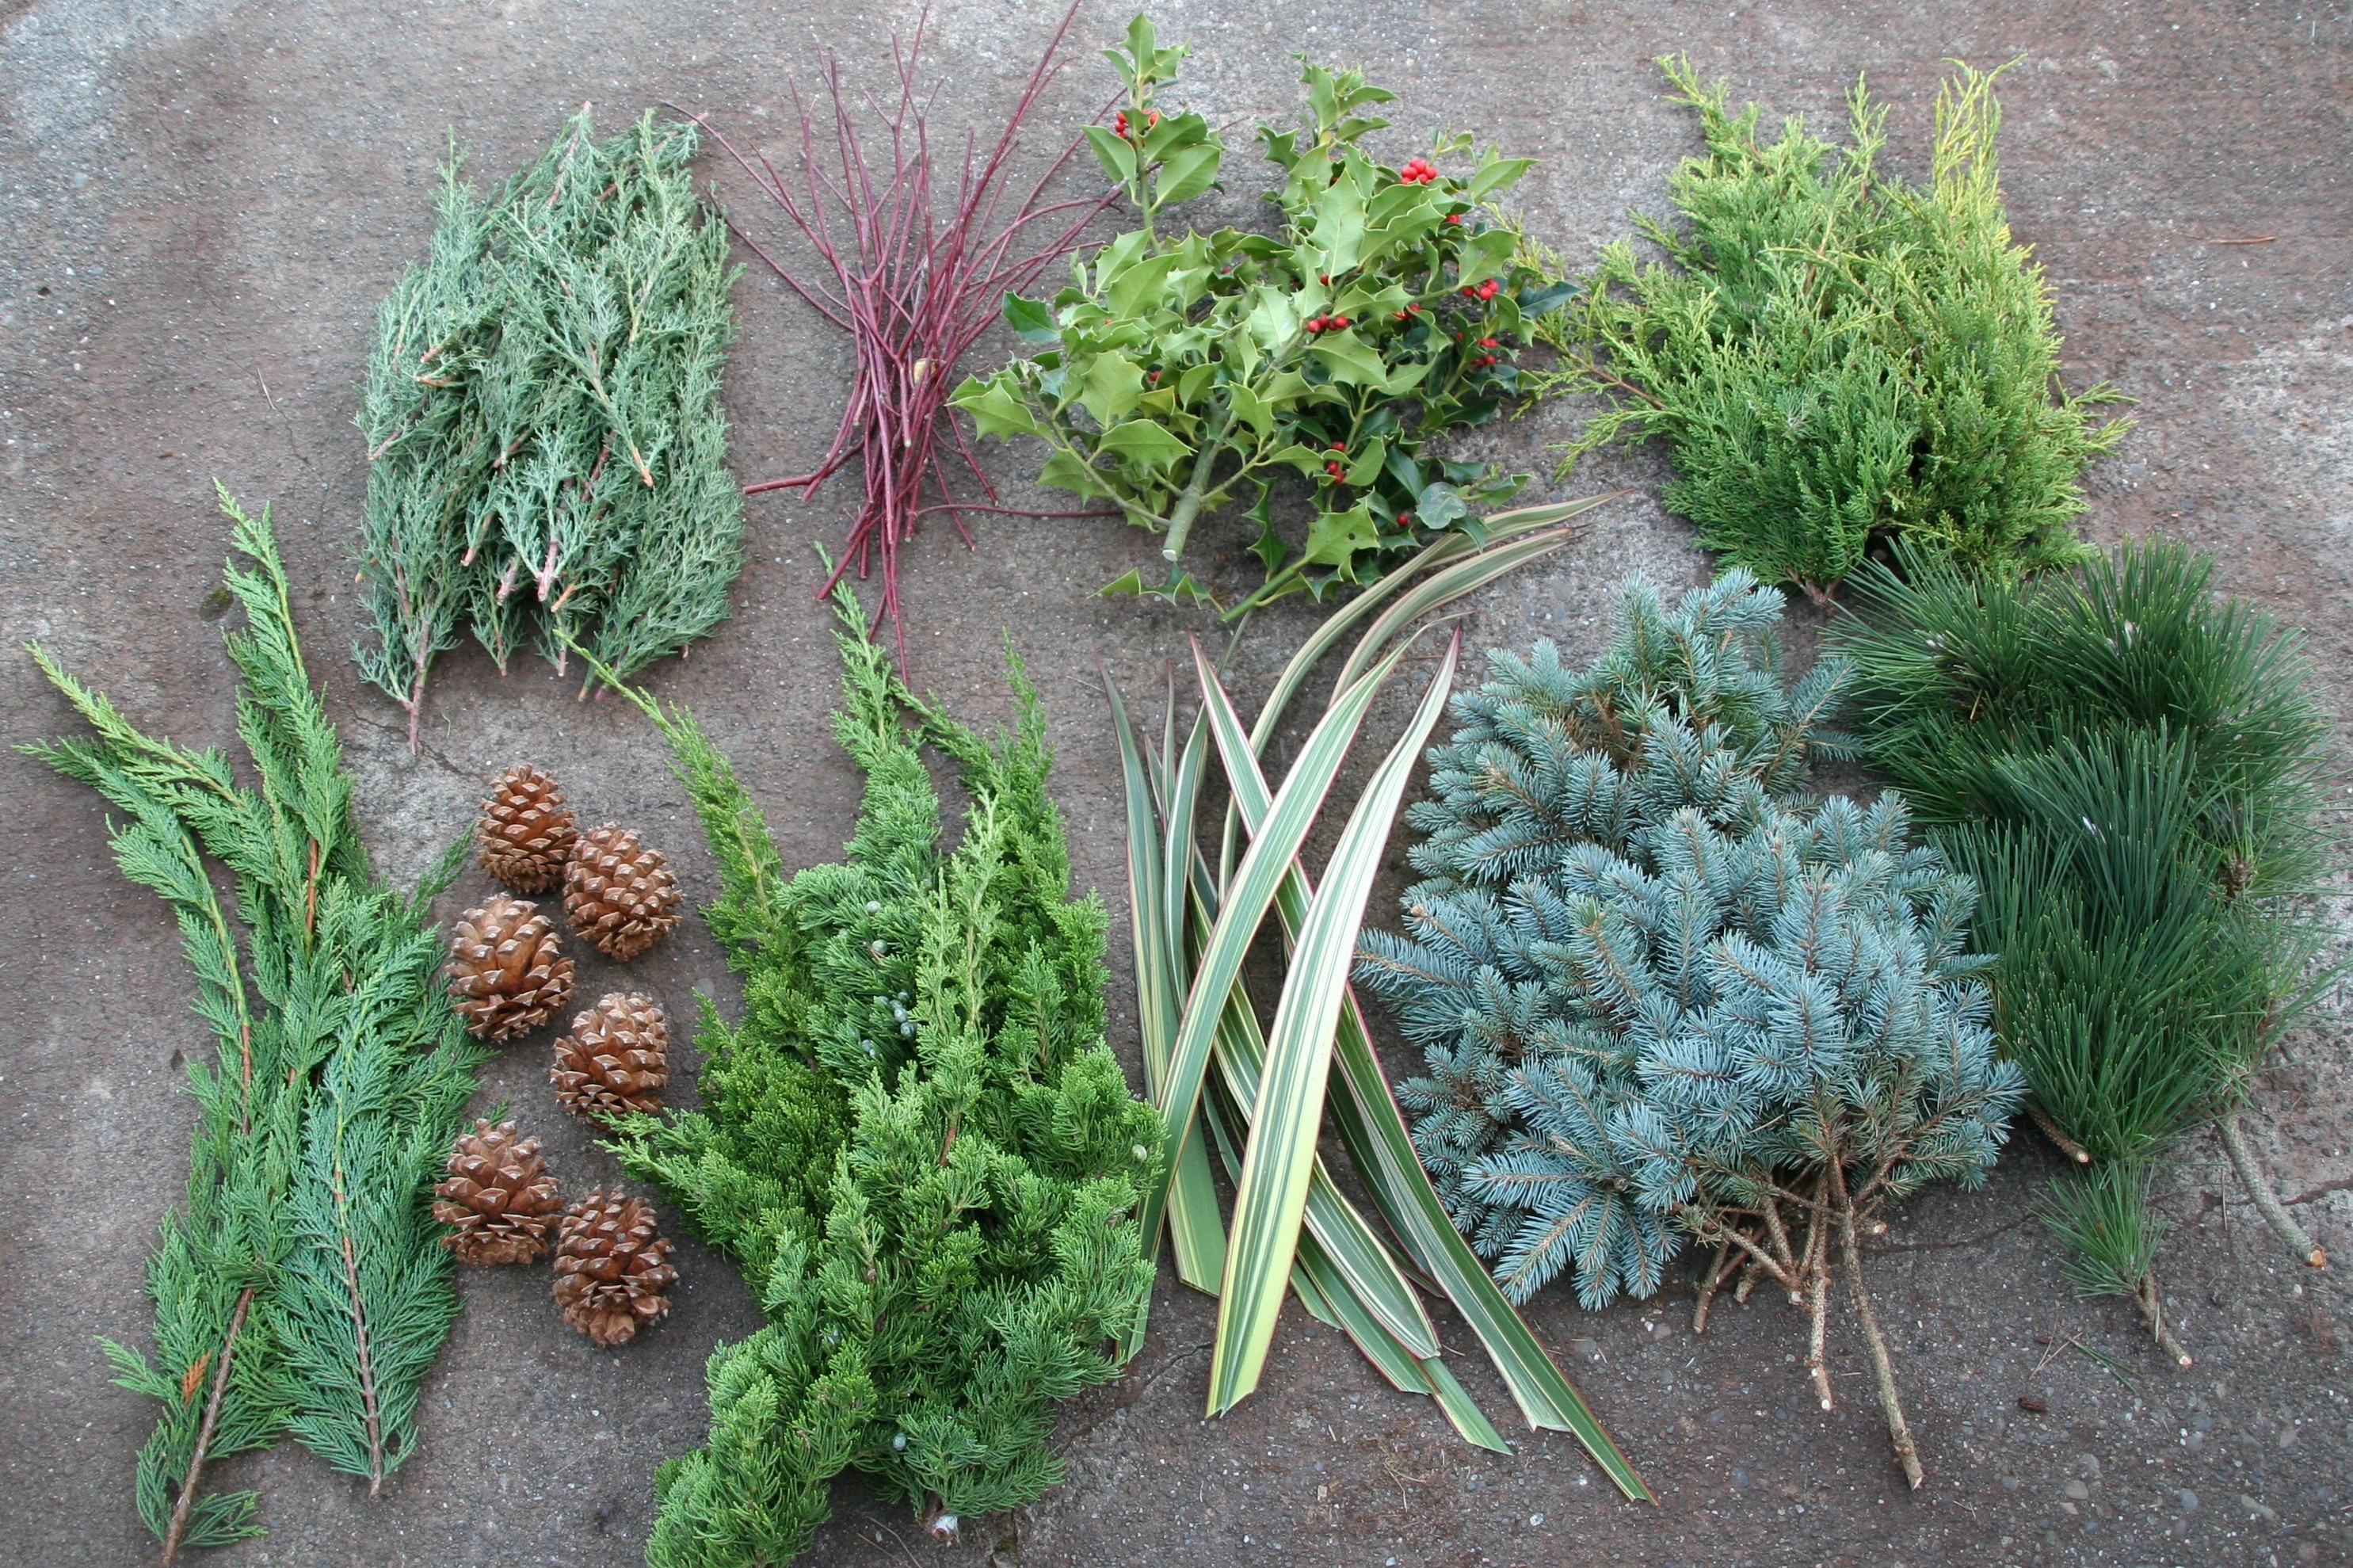
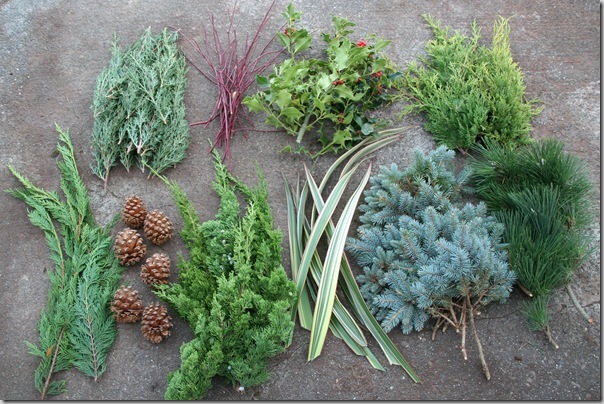
- Conifers of any and every kind – pines, spruce, juniper, Doug fir, noble fir, cypress, colored conifers of every description, and plenty of green stuff for filler (go to the Christmas tree place and you can usually sweet-talk them into giving up some foliage)
- Red- and yellow-twig dogwood stems are the bomb
- Holly, or variegated false holly (Osmanthus ‘Goshiki’ or ‘Variegatus’)
- Silver dollar Eucalyptus
- Herbs like rosemary, sage, lavender and bay
- Pinecones
- Rose hips
- (Learn from my mistake and avoid Cotoneaster – yes, the berries look very appealing and seasonal, but they fall off right away and get tracked into the house, which is WAY uncool.)
If you have great restraint, you can choose a color theme, like silver dollar eucalyptus with blue spruce and cream-variegated holly, or yellow-twig dogwood with some golden-splashed cypress and a little green as a backdrop.
Or you can be like me and jumble together whatever colors look good to you in the moment. I mean, its primary purpose as a holiday decoration is to look cheerful, and gaudy still brings cheer. Right? That’s what I tell myself.
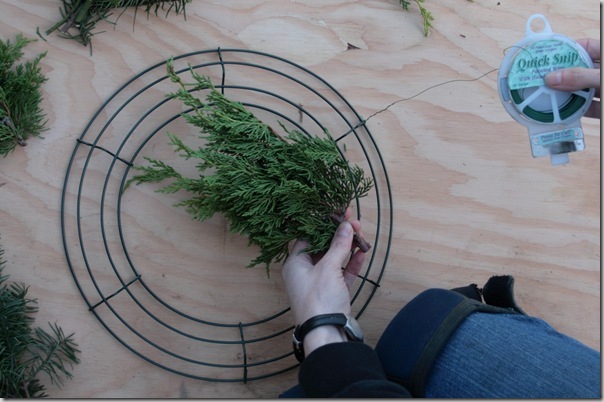
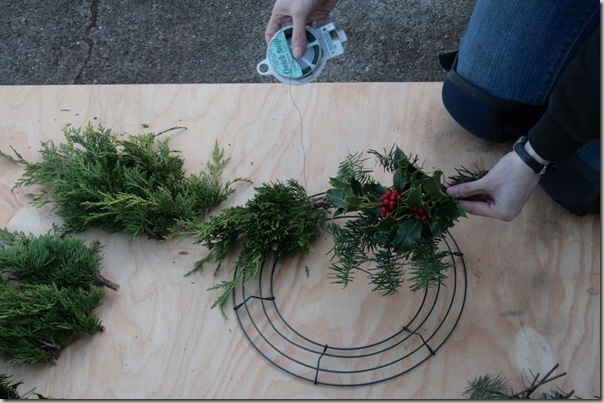
Once you’ve decided on a theme, clean up your trimmings by cutting them to 6-10” long. The tips of the stems look best; discard the woodier sections of each branch. Pick a few stems and bundle them together with the cut ends facing the same direction. Attach your floral wire to the wreath frame (anywhere) and tie in your bundle of trimmings securely, wrapping the wire around the bundle once in the center of the bundle and once at the bottom near the cut stems.
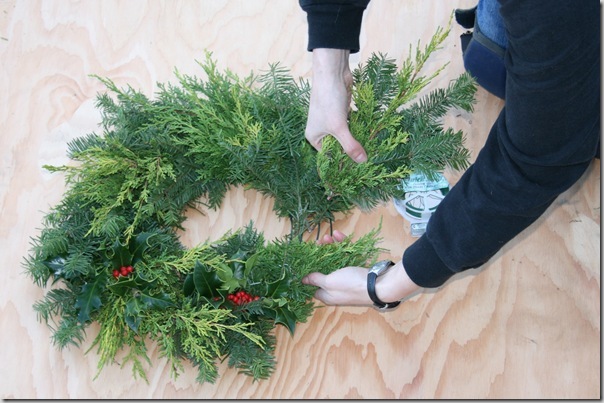
Leaving the wire attached and holding it taut, grab a second bunch of foliage and set it over the first bundle with the cut ends facing the same direction. Cover the cut stems of the first bundle and wrap the wire around your second bundle, moving diagonally downwards with the wire.
Use more foliage than you think you need – you don’t want to see the wreath frame beneath your greenery!
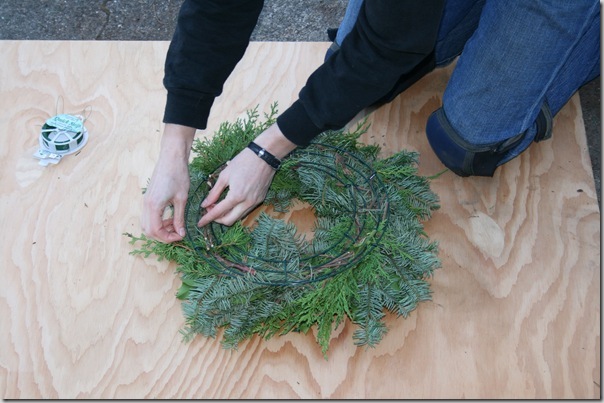
Keep wiring foliage in around your frame until you reach the end. When you get to the last bundle, tuck the stems under the leafy top of the first bunch of foliage so that no cut stems are visible. Securely attach the wire to the frame and cut the wire.
Now’s the time to add accents like ribbons or pinecones, if you’re so inclined. To add a pinecone, wrap the cone with wire around the base, tucking the wire inside the cone so you can’t see it, and wire it to the frame. You can wire on a finished bow or just tie a bow around your wreath.
If you want to do something ridiculous like use spray snow or spray glitter all over your nice wreath, go right ahead. Just don’t tell me about it afterwards.
The care and feeding of wreaths
Thank goodness, this is a short section. Stick it outside where it can get some moisture from the air, and spritz it with water every so often. That’s it! At the end of the season, compost the dried foliage and save your wreath form for next year.
47 responses to “How to Make Your Own Christmas Wreath”
LOVE the DIY, thanks! & love the giveaway! enter me please 🙂
rlahardison at gmail dot com
Your wreaths are gorgeous, Gen! I’m so impressed. You make it look fairly simple so *maybe* I’ll give it a shot, but I have to say I find wreath making very intimidating. Hence why I should win that beautiful P. Diddy wreath!
Great instructional piece and so fun to read! I’m inspired to get wreathing right away! Thank you!
I love these wreaths and would love to win one. Thanks for the chance.
The wreath looks great. Thanks for the helpful tips and nothing better that fresh greens inside your home for the holiday.
Gen- WOW love the wreath I have never been able to make one myself, I tried once and it frustrated me so bad all materials kept us warm for a bit in the fire pit! Like Erin I think I’m gonna try using your How-To!!…Jim
Beautiful wreaths!! Would love to win one! 🙂
I love this DIY! The wreaths are beautiful!
This project inspires me to find my wreath frame and go outside and trim some greens….maybe this weekend, we’ll see.
Would much rather win the beautiful wreath from The Berry Family of Nurseries and P. Allen Smith. 🙂
This project is definitely on my to-do list this season!
lovely wreaths! but with my handicrafting skills, I am hoping to win one…..
Beautiful wreaths. I love the ideas on making them.,so I don’t need to win them you can give them to someone else.
I recently discovered you when looking for info on how to prune my hydrandra. It’s done now, thanks to you.
i would love this beautiful wreath on our front door!
Thanks for posting the step by step directions with beautiful pictures. It gives me so much more appreciation upon winning the wreath!
We are all so blessed to be able to go outside and use the different evergreens and compliment them with other various, wreath worthy pieces of nature. I grew up in northeastern PA and miss the smells of fresh cut evergreens. Living in the south now, I would love to win one of your beautiful, evergreen wreaths and enjoy the scents of the season.
Beautiful wreath. Would lo0k nice on my door..
Fantastic post, Gen! I can’t wait to share this post with others. Though, then again, why would I want to do that since I’m hoping I win! My pinecone wreath is sorta sad looking on my front door right now ….
Love a great tutorial! There’s nothing like real fresh greenery to make the holiday’s come alive.
So pretty. Thank you North Coast Gaedening. <3
Well if I don’t win I can now make one with your directions! Thanks for the chance to win!!
very good demo on wreath making…would make my Christmas special to win one…
This is great idea. Easy instructions as well!!! Thanks.
I love the instructions for the wreath frame. I am going to try and improvise with a few grape vine forms I have laying around, as well!
So that’s how to do it!!
Nicely done!
You’ve made wreath making look easy. Maybe next year I’ll give it a try.
I would LOVE the wreath! Thanks so much for the instructions, though. Our Master Gardeners group is getting together next week to make wreaths, swags, and centerpieces for ourselves and your list gives me some great ideas!
What a generous giveaway–thanks for the instruction as well!
You make that look doable!
what a great give away!!
i love your ideas i dont put bows on a real wreath either enter me please thank you
I’m making an advent wreath (missed the first Sunday already) and a Garden Club holiday tea design for early December, so my dance card is full! I’ve got my fingers crossed to be a lucky winner…
your instructions make it so easy, don’t know why I thought this would be so difficult
Love your wreaths! Very creative.
Just discovered this site–love it!
I love Christmas wreaths!
Thanks for the sweet giveaway. And, just wanted to say that here in San Diego, many of the Home Depot stores giveaway their tree trimmings. Just go to the area where they have the Xmas trees. There is usually a tub or large box full of ’em!
Thanks for the instructions. I am going to try this!
Great DIY photos Gen! I made my own last year and discovered tons of greenery in the garden I might otherwise not have appreciated.
This year, however, we are mid remodel (again) and I’m not sure my sanity will allow me to deal with any more mess. If I won a ready made wreath I’d be delighted!
Thanks for a chance at another giveaway! I would love to win!
Conifers – finally! :^)
You know it, Ed! I totally thought of you. . .
Thank you for your instructional posting. I volunteer and coordinate arts and crafts for young children in a community-based organization. We will be making fresh holiday wreaths this week! I have made dry wreaths in the past with children, but never fresh ones, so your post was very helpful. Thank you!
I love the ideas you gave me. I find so many great things in nature but don’t always know how to pu them together nicely. Would love a rustic wreath for our home too!
Thanks for the instructions on making my own Christmas Wreath. My wife and I were going to learn to make our Christmas Wreath last year but never got to it. We will try this year because you make it look so easy. Thanks great article.
[…] but I was surprised about holly. Are these plants invasive in your area? I found a helpful blog post if you are interested in making your own decorative […]
Interesting, seasonal read. The wire frames look pretty easy (of course a guy like me would never stumble across them). One of my last clean-up jobs involved cutting back some low hanging growth on a pine and shearing the backside of a holly hedge. Perfect material to add to my New Year’s bonfire pile and the thought of making a wreath came to mind. Using simple wire coat hangers and thin green wire that I keep in my pruning kit I managed fairly well. First attempt was a crude prototype but by my third I was actually having fun. One thing learned, trying to make the hanger perfectly round is a waste of time, your pruners cover that end more easily. I made one for my Mom this year with juniper clippings in probably under 15 minutes. She attached some small bulbs to add a little contrast and color. Looks better that alot of those pricey pre-fab wreaths at the store. Well worth the effort. Unique Christmas Cheer on a budget.